Quilt-Along Step 4

Step 4:
   1.  Take row D and measure its length.  Mine was 30 1/2" long.  My row C is now 30 1/4" long due to the quilting - Remember when I measured it in step 2 and it was 30 1/2" long?  I'll be able to stretch row C (I'll pull on the bottom a little in whatever square needs it.) the quarter inch to make the seams intersect and the vertical rows to match.  Here is the new row next to the one I've quilted"
2.  Put the new row wrong side up on your quilted row. Check that the seams on the row you are adding are pressed the opposite of the first row.  Match the seams and pin.  Roll up the quilt on the right side as before.
Note: Here is a photo of how I fold the quilt in an accordian pleat (the part that would be on my lap) to make machine quilting easier.  It is weight that makes it difficult to quilt, so try to keep it level on your lap and left side.  Hanging over the sides makes it harder to quilt evenly.
3.  Starting at the top, and using a walking foot, position your quilt to start stitching after bringing the bobbin thread up to the top of the quilt.  Sew your seam with a steady speed - remember the walking foot is doing the pushing, not you.
Here is my added second row smoothed over the batting.
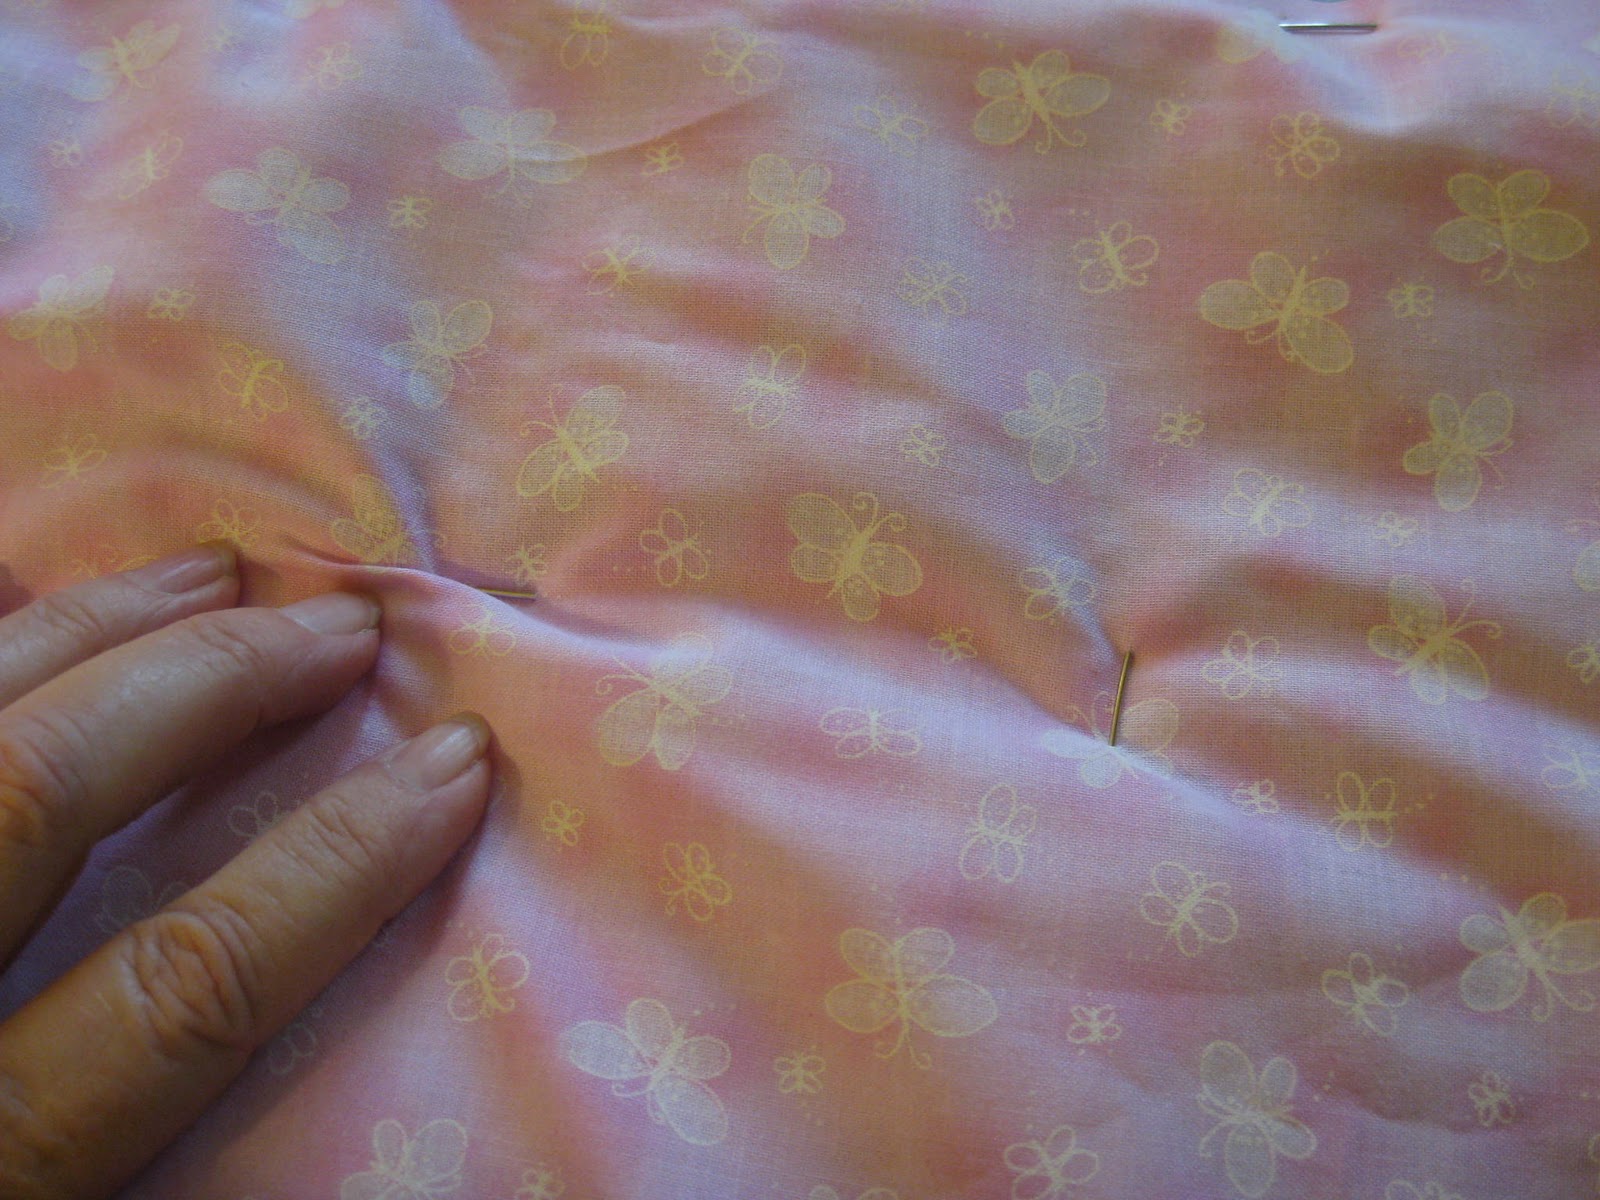
4.  Next we pin baste the row before quilting.  Lay the quilt with the new row on your left( if you're right handed). Gently pull the two layers away from the seam you just made and pin the row down:

This will keep wrinkles from forming when you quilt it. Once you've pinned it turn it over and run your hand over where you will quilt. Photo below shows you a wrinkle I found on the back.


I remove the pin, smooth out the area and reset the pin.  You might have to do a few of these.  And when you turn it over, check the front also that it's smooth.   Quilt your added row as before.  You now have the technique in full.  You can do all the remaining rows in the same fashion, just flip the quilt when you are done with the right side, and do the rows on the left starting your seams at the bottom of the vertical row.  This keeps the bulkiness of the quilt to your right.  I'll post again next Thursday with the borders and to give you time to do your rows.  But you can email me any questions whenever you like.  See you then.

Yard Sale Find

Hi, sorry, sick with a cold and my post on the quil-along will have to wait.  That comes of having such an intense thursday.  I've started a sewing circle at our church - St. Ann's Sewdality.  Our first meeting was yesterday and 7 lovely ladies showed up with enthusiasm and plenty of ideas.  We pray and make quilts, blankets or afghans for those in need in the community or our parish.  And our first quilt is going to a parishoner who is undergoing surgery.  Our patroness is St. Ann, the mother of Mary, the Mother of Jesus.  She is the patroness of Christian families and among other things, seamstresses.  Note: we ask for intercessions (just as a child would ask its mother for help in getting dad to agree to something) not worship a saint since Catholics believe the saints in heaven will help us.
    They were enthusiastic about tying quilts and getting them done fast and of the 8 of us - only 2 do not have sewing machines. We range in ages from 20 somethings to 80 somethings. One will hand piece and the other will assemble kits from squares and strips cut by others.  Our second quilt is one I am donating.  I found this quilt at a yard sale.  Here it is:


I bought it at the yard sale for $2.00 and it looks like brand new.  I know some mom and baby are going to love it.  Okay exhausted my energy - off for some tea and then a nap.

Step #3 of Quilt-Along

For Step #3 we'll begin with our 38" square of backing fabric.  Iron it nicely, fold in half and iron the crease at the outer edge.  Do this for both sides.  We'll use these small creases to mark the halves of our quilts.   Now I laid the back on my carpet with wrong side up.  Next I placed my 38" square of batting on top of it.  Now I went around the edges with safety pins and pulled the back tight through the batting by sticking the pins into my carpet pad.  If you use a table to sandwich, you can use double sided masking tape about an 1" from the edges of the backing to make it somewhat tight. This is an important step to reduce pleating of your back when you are quilting.

Our quilt has 5 vertical rows of blocks.  Take the middle vertical row (C in my case) and measure it.  Mine is 30 1/2".  Make a note of yours. I centered the row on my sandwich 3 3/4" from the top and bottom and    15 1/4" from side to side.  If you are using 3 rows, use row #2.  If an even number of rows, email me. See photo below. 
You can see the pins on the edges. We left room for the border all around. Now pin your row at the corners,  along the seams and in the center of the block. Once that is done, I take out the pins and pin them all around the edges of the quilt to stabilize the sandwich.  Turn the sandwich over and run your hand on the pinned back to see it if is smooth.

Take your sandwich to your sewing machine.  When I quilt, I use the same thread in top and bobbin, a Microtex 75/11 needle, feed dogs down, a single needle plate, and a open darning foot. I am going to do a large meander over the row staying about 1/2" away from all the edges.  Don't worry - as you add more rows and quilt, you can fill in spaces that may look empty.  This is to anchor your sandwich and get the hardest part of the quilt quilted.

You could also use a foot with a plastic foot. Note:  If you've never quilted on your machine, stop and make a 12" square sandwich to practice.  Pin your sandwich around the edges and one safety pin in the center.  Set up your machine.  Bring your bobbin thread to the top of your sandwich and take a couple of tiny stitches to anchor the threads.  Now with your hands on both sides of the foot - start to sew and use your hands to guide the sandwich going at a steady speed.  When you start to do a curve, slow down a bit so you won't get big stitches.  There are a lot of good how to machine quilt books out there.  I started by quilting small charity quilts and haven't looked back. Hey I've still got a lot to learn, but with the practice, they are starting to look better and better.  That's all it takes - practice.  Here's a site to see a machine quilter in action:  http://www.daystyledesigns.com/stippling.htm

Or you might like to do straight line quilting.  I do all the above but use my walking foot and guide.  See below:
This will give me straight row quilting.  By lining up the guide 1/4:  from the edge I get a straight lines through  all the blocks evenly spaced. Reverse the guide for the other side of the blocks. If you use the edge of the blocks you'll have a nice pattern of spaced lines. Whatever you want to do.  With this method all you need to do is two lines and you're done with the row.

Roll up your quilt on the right side of your row of blocks and place it under the needle.  Bring your bobbin thread up to the top, and take a few tiny stitches to anchor your threads.  Meander at a steady speed over your block leaving a 1/2" free of quilting on all the edges and guiding the row with your hands.  Here is my completed first row - took about 10 minutes.  Ps:  I put the tape from the top and bottom blocks of the row and stuck them to the batting to remind me which end was up.

That's it for this step.  If you have questions, please email me.  See you friday - Thursday is going to be way buzy for me. 
 

Design Wall Monday 2/7/11

New block up on my wall. This is from Quiltmaker and is the Project Linus block for this year. I made one and that will be it for me. Paper piecing is a bit of challenge. And I'm going to do more of it, but not of this little sailboat. My frustration was getting the sky to look like sky - my fault for picking a directional print. I'm going to use it as a medallion in another charity quilt. And I'm adding some crumb blocks around it - LOL, not the the usual baby quilt, but I'll use a novelty flannel on the back.  In skimming quilt history books, I've seen a lot of crib quilts with eagles, Baltimore album blocks, pomegranites, etc on them.  This baby is getting a more unusual one, too.

What do you think?  Will mama use it as a wall hanging?  I'm wondering.

Stash Report 2/6/11

Have found the back to the first quilt to tie, so that means another 1.25 yards used. The binding is part of that total because I'm going to bring up the back and use it for the binding. Made some crumb blocks and used another 1/8th of a yard.

My numbers are:

Used/Donated this week: 1.37yards
Used/Donated Yr to date: 8.09yards
Added this wk: - 0.0 yards
Total Yr to date Added: -1.25 yards
-------------------------------------------
Total Yr to date Used 6.84yards

Over at PatchworkTimes, Judy has posted the state of her stash. Check it out.

Ready for Step #2 of our Quilt-Along?

Ready for Step 2?  You'll find that below.  And for those of you who want to make a smaller quilt, I've added some additional info at the tab "Quilt-Along. 

Step 2:

Here is a photo of my choices:


Once I have my layout, I take masking tape and mark each square with a row and number. This way I keep them in order when I go to sew them.
Here's a sample of row 4: 
 
Yes I moved one block after the first picture! Photos do that to me - they make me see the value of color.

Then I pin one row together so that I can work on one row at a time.


Now you can go sew your blocks into vertical rows. But don't sew the rows together into a top. Here's where this method starts to differ from the conventional quilt process. More on Monday.

I'd love to see your choices.

Starting the Quilt Along

If you read my previous post, you know I now have 2 projects ready to be assembled and quilted. With friends asking me when I'm gonna teach them to "quilt as you go", it seems the perfect time to start.  So if you'd like to quilt-along, go to the Quilt-Along tab at the top of the page and you can read about the first assignment.  I'm making a charity quilt, yours can be the same, a table topper, a wall hanging or whatever you want.  They're going to be between 30 - 36 " square.  Here are some blocks I might use:


And here's a Mr. Linky so that viewing that eye candy will be easy.  Look forward to seeing yours! Why not post a photo of your fabric or blocks? Look forward to seeing yours!

Design Wall 1/31/11

I have two quilts on my design wall - one is the first quilt we will tie.  You can see it here and the other is my yellow monochromatic challenge.  The rows are now sewn although you can't tell from this picture.  The  rows are ready for me to start quilting it as I assemble it -in other words another quilt as I go. So the next item is to find a backing and a batt square.

Off to the stash.

What's on you design wall?  Click on Patchwork Times on my left sidebar and go see what goodies the others are working on.

In the Garden

It's raining, so I went to clean out our dry wall on the back side of our house for the runoff to drain away and saw these.
My yellow Lady Banks Rose is starting to bloom.  Guess she thinks it's Spring already.  I'll take her prognostication any day over that ground hog.

It's in the low 50s today - a 30 degree difference from last week when it was in the 80s - typical California weather - LOL.  And here is our adenium. It has bloom all winter long.

Stash Report 1/30/11

Made another secret block, so I used about 1/8 of a yard there of scraps.  Assembled a charity quilt to tie and used about a yard of scraps for the top.  Haven't made the back yet.  Found a yard of fabric to donate to the Thrifty Corner at out guild.
So my numbers are:

Used/Donated this week:  2.12 yards

Used/Donated Yr to date: 6.72yards
Added this wk: - 0.0 yards

Total Yr to date Added: -1.25 yards
-------------------------------------------
Total  Yr to date Used     5.47yards

Hey, I almost doubled my fabric used!

Over at PatchworkTimes, Judy has posted what she and others have used this week.  Check it out.

First Quilt to Tie

I dug in my stash and found a cowboy print and have put it together for the first quilt St Ann's Sewdality will tie.  It will measure 36" square.  I've got the rows done and guess it will go up on my wall til I can get back to it.  Must think of a backing. I'd like to find something that we could just bring to the front and bind it that way.

Do you think a toddler would like this?  The pregnancy center takes things for up to three years of age.

Look what my neighbor gave me!

He was going through some drawers and found this quilt top and wondered if I wanted it.  It is hand quilted.  Enlarge the pic and tell me if you think this is 1940s fabric.  And is the block a dresden block?

I'm so excited - don't know what I'll do with it as it is 42 blocks or around 80 x 106 total.  It's just a tad narrow for my queen size, but I don't know how I'd quilt it.  Would love to have comments on this.

Design Wall Monday 1/24

Well I was going sale tax crazy, so I just dropped it all and stole 30 minutes to finish a square off of my design wall.  It's 8 1/2" by 10 1/2" .  Is it too big to call a mug rug?  If so, what should I call it - a micro quilt.
In QOR - guess I would call it a quiltlet.  But for now I'm calling it Under the Stone Pine.
The little house block was sent to me by Beth Shibley of LoveLaughQuilt  .  She hosted a house block swap so some lucky quilters could build their own friendly neighborhood.  There were three winners.  Some gorgeous blocks were turned in.  If you visit Beth's blog, look for the little house on her right sidebar and you can go see all the cute little houses.   To see what other's have on their design wall, click on the button for Judy's Patchwork Times on the left sidebar.

Stash Report 1/23/11

Nothing in.  I went through an old box in one closet and found a bunch of scraps that are going, so a 1/2yd out as a donation.

So my numbers are:

Used/Donated this week: .5 yards


Used/Donated Yr to date: 4.6yards

Added this wk: - 0.0 yards

Total Yr to date added: -1.25 yards

-------------------------------------------

Total Used Yr to date 2.35yards

Back to taxes,
Angie

Here's some Eye Candy

This is my progress report for last thursday - zilch!  And that's was because I was SUPPOSE to be doing the end of year report for my volunteer group and my taxes, but actually I played hookey and went to Road to California - the largest quilt show in southern California.  It's this weekend, ends tomorrow and is in Ontario, California at their convention center. Here the Best of Art Quilts - I loved it!


Here is the Best of Show - it was spectacular also - I love these landscape quilts - so much I wonder why I haven't made one.  It could be that I'm terrified of the process.


Here's is the one we came to see.  My friend, Sandy, want to see her husband's best friend's daughter's entry to R2CA.  Another beautiful quilt.  I love her use of orange for the background
 This one Sandy I picked as the Viewer's Choice - I'm not sure you can see it but the table and vase seemed to come out of the picture in a three dimensional way.
This lady is a true artist!
And here are three I would love to make someday - all stunners as far as I'm concerned.  If you're in SO CA off to the quilt show with you.  And yes, I was good, I didn't buy a thing.
A beautiful Beth Ferrier patten quilt!


Do you see a pattern in these?

It's a Giveaway!

Go to  Lila Tueller Designs    for a chance to win these luscious fabrics:

The First WalMart - or so they called it:

Looking southwest from the front door
The Key's Ranch in Joshua Tree is a success story of an early pioneer of that area.  In front of the house, they had what the ranger called the First Walmart of the area.  William Keys was a rancher and miner and all around entrepreneur.  In his front yard, he had a little bit of everything a miner or rancher might need to get it rich quick.  
 Keys was the closest thing to a store in the area.  People would buy from him and go off to their holding. And Keys kept an eye on them.  For once they gave up and left, he would go to their place and pick up all the things they abandoned and replenish his inventory - thus selling the stuff over and over (not that Walmart does that -LOL). 
His wife got into the act by setting up a gift shop - but her sales were final - she sold soap, knic-knacks, snacks - not something you could recover.  Here's her store:

Stash Report/Design Wall Monday 1/16-17

I was gone this weekend, so I'm combining posts this time.  I finished my secret block and changed out the 4 " squares on my 4 inchers on my yellow monochromatic challenge and used about 1/10 yd, so

So: Used/Donated this week: .10 yards

Used/Donated Yr to date: 4.1yards
Added this wk: - 0.0 yards
Total Yr to date added: -1.25 yards
-------------------------------------------
Total Used Yr to date 2.85yards

Hope to do better this week.

And now for design wall - it's still the same with the blocks although they are now the right size.  I removed the 4" blocks and put 4 1/4" blocks and resewed them and now they are 8" like the rest.  Hopefully I will have time to work on them, but I'm not optimistic as I have a treasurer's report and taxes to work on.

What's on you Design Wall?

My Holiday Blog Post 1/15-17

Back from our desert sojourn.  Our friends have a house in Rancho Mirage and they invited 5 of us to come out for the 3 day weekend and enjoy the desert.  Every time we go they plan something different for us to do.  This time we went to the homes/legacy of two prominent pioneers of this area - William Keys and Cabot Yerxa .  They were colorful characters and it was very interesting learning about them.   Here is a saguaro cactus we took a picture of during our trip.  As we had a late start on Saturday, we drove through Morongo Valley and Yucca Valley to get to the Joshua Tree National Park Visitor's Center and on the way we passed this wonderful saguaro speciment!  It's right there in the middle of town. These take years and years to get this size, so we were thrilled to see them.  At Cabot's museum we found some more.  These are even taller.  Some day I'd like to go to the Saguaro National Park in Southern Arizona where there are many, many of these.  They have these beautiful white blossoms.

This n That #1

We're leaving tomorrow for a 3 day visit to Palm Springs, so not much quilting is getting done.  I did hem a curtain for my DDIL in CO so she can try out how they hang and what length she wants them (got it off in the mail, too), finished my secret block (more on that later) and  unstitched my 4 inchers to replace the large block.  So I'm leaving you with a photo or two:

 Here's Alan at 2 months.  Last weigh - in said 7.9 pounds so he's right up there where he should be if he had been born Dec 20th instead of Nov. 11th. He's so precious!
Then here's a scrappy quilt tip - when I'm making a scrappy quilt I use left over thread and partly filled bobbins to sew them together.  If the quilt is most one color - I'll try to use color in that family, but for truly scrappy quilts, it's whatever partial thread is on hand for blocks making AND quilting.

First UFO Done

I'm ready to start on another ufo for the UFO challenge.  Yes, ufo #6 is done and will be gifted to Riverside Life Services.  I may not be so lucky next month as this one only needed quilting and binding to be finished, and it was 36"square.  My guardian angel was visiting MO when Vince pulled #6 from the bag to keep me enthused by not having to work on a bigger challenge on the first month.

I found this block in a picture in a Connecting Threads catalog.  I was intrigued enough with it that I sat down and figured out how to put it together.  Wish I had jotted down the name of the book it was in.  Whoever you were, thanks for this design.

I took large scraps from my stash and made the backing, so maybe I should consider this a 2 sided quilt.  I like how the quilting shows up on both sides too.

Free Book Drawing

was done tonight and the lucky receipients will be getting their email tomorrow (or tonight if you are night owls).  So look for Free Books at A Quilting Reader's Garden email (or similar).  I'm sorry I can't send everyone a book or email as we had a lot of players - some followers sent private emails, but thanks go out to all who responded.

I may have some more books later as I continue to destash.

Quilty Hugs,
Angie

Design Wall Monday 1/10

Still working on my yellow monochromatic challenge.  Here are the 4 inchers sewn together.  Now I have to get batting and backing ready so I can start assembly.
Limited quilting time this week - have lots to do with DGKs, but that's life.  If I get my 15 a day in, I'll be happy.

What's on your design wall?  Go over the Judy's Patchworktimes to see what others are doing.(on left sidebar)

Stash Report 1/9

Going through my stash and I've donated 2 yards of pieces to our Thrifty Quilting Corner at my Guild.  They resell quilting and sewing items with monies going to fill our Happy Bag for Cancer patients.  I used a 1/4 yd for binding for UFO #6 (yeah, it's done!) and pulled 1/4 yd of fabric for a block I am going to play with.

So:  Used/Donated this week:       2.5 yards


Used/Donated Yr to date:             4.0 yards

I bought one yard at LQS friday - actually I only needed a 1/2 yd for my block project, but they wouldn't let me pay with a credit card for a $4.96 purchase, so I had to buy another half yard to make the sale reach the CC minimum.  Talk about poor customer service.  I'd go elsewhere, but it's the only quilt shop in town.

Added this wk:                         - 1.0 yards

Total Yr to date added:            -1.25 yards

-------------------------------------------

Total Used Yr to date               2.75yards

Progress Report: Greening of the Batt

I've designed and gotten the blocks for the yellow monochromatic challenge assembled.

I've quilted and made the binding for UFO # 6 - and hope by monday to have that done.  To get there I had to come up with batting for the 36" quilt and I did it by salvaging(aka as greening, lol) some batting from my batt bag.  I'll never understand why batting companies can't come up with more usable sizes of batting than what they sell(52 x 64 would be my preferred size - what's yours?), but then I guess it would be too hard to come up with all the sizes we need.  So I usually have strips of batting left over which I save.  I'm sure you must too cuz we're always saving scraps of fabric, aren't we?

So I went through the bag and pulled out batt strips of the same kind of batting and laid them out on the floor.  I had 3 strips and one small square of fabric which when laid out gave me a 38" overall square.  Taking these to my cutting table I added the square to one strip to make it long enough.  I learned this method from Marti Michell in her book:  Machine Quilting in Sections  It's a great book. So first I overlapped the two sections I wanted to join, and with my rotary cutter cut a wavy line in the center of the overlap.

Here's what they look like separated. 
Throw away the bits left over from the cut overlap and fit the two piece together again.

Now I take a strip of fusible interfacing and lay it over the cut.
Here I'm showing you the piece longer than the batting but that is just to show the interfacing.  When I iron it on, the top edge meets the top edge of the batting and the bottom edge is trimmed to the bottom edge, and one can hardly see it.  Now I have a piece long enough to use for my 38" batting square.  I attached the strips to the larger rectangle in the same way, and I had my batting for my ufo sandwich.
I know others just line up the two sections and zigzag them together, but the edges are never straight enough and I got bumps here and there and with hi loft batting the zigzag stitch tended to flatten the batting at the seam.  This way one can't even tell where the joints are. 

Design Wall 1/3/11 - Yellow Monochromatic Challenge

On my design wall is my Yellow Monochromatic Challenge.  I just pulled yellows and cut blocks rapidly and this is what I got: 
I liked the blue one posted elsewhere so much I went with the same design except mine is going to be raw edge applique as I quilt as I go.  Will measure 30" square and will go to our NICU center.   Taking a picture sure shows how colors differ from what the eye sees.  The print in the bottom left corner looks yellow to me as that is the background, but in the picture most of what you see is the little blue butterflies.  What do you think?

First Stash Report for 2011

Well, I worked on the monochromatic challenge and guesstimate I used about 1.5 yards of yellow from my stash and bought a fat quarter from Jo Anns, so:

Used/Donated this week:         1.5 yards
Used/Donated Yr to date:        1.5 yards

Added this wk:                      -  .25 yards
Total Yr to date added:          -  .25 yards
-------------------------------------------
Total Used Yr to date              1.25 yards

Did I do that right?

LOL
Happy New Year,
AngieN
ps:  I have almost free books (cost of postage only) over at my blog as part of my stash if your interested.
http://quiltingreadersgarden.blogspot.com/

Free Quilt Books

Okay, we're in 2011 now.  All festivities are over now (well, DGS Frank's birthday is next week, but I'm just sending a present), so I can get back to my room organization.

You might remember I needed to get rid of some books.  Did do away with 7 of them, so have 13 left.  Here's an example:   

On my home page you will find a tab for Free Books.  Because I want these out of here, these are free for the cost of postage.  The postage is for USPS Media Mail of $3.25.  That will cover the postage and the envelope to send it to you.  I thought at first doing these first come, first serve - but some quilters don't check their emails as often as others.  Therefore, please comment stating the you'd like to have.  If you use Anonymous please be sure to add your email in this format:  janedoe(at)server(dot)come.  

 Next Sunday, Jan 9th, I'll take all the ones who want a particular book and draw a name randomly and that will be the one I'll ask to send me a check and their snail mail address.  If you would like more than one, your name will be entered into that drawing also.  So some may wind up with more than one book.  I'll quote you postage if that happens.

And to up your chances, any one who follows me or signs up to follow will have their name entered twice to get a book.  Okay, go check out the books and comment.  The free books are now up for grabs!

Another Flimsy

I'm making the Raincross Quilt Guild's Block of the Month into baby quilts each month instead of blocks for an eventual quilt. Why? ...